Friday, November 16, 2007
Smoky Chorizo Pie
Tuesday, October 30, 2007
Gummy Treats!
Gummi Bears
1 small box jello with sugar (any flavor)
7 envelopes unflavored gelatin
1/2 cup water
Mix in a saucepan until the mixture resembles playdough. Place pan over low heat and stir until melted. Once completely melted, pour into plastic candy molds, and place in the freezer for 5 minutes.
Saturday, October 20, 2007
Scott Roast
Ingredients
2.5 - 3lbs pot roast meat (chuck roast)
1-2 lg white onions, sliced
2 lbs carrots, peeled & cut
6 - 8 medium potatoes, peeled cut.
1 can cream of onion soup
1 pkg onion soup mix
1 c. red wine
1 c. water
Preparation
Rinse meat, arrange in rectangular baking dish or in crock pot. Arrange carrots, potatoes and onions around meat. Whisk all liquids and soup mix together, pour over meat and veg. Cooking options: bake 4 hours @ 350°F in oven (cover with foil) or in crock pot for 8 hours on low, or until fork-tender.
Options
Serve with flaky can biscuits!
Meat Balls 'n Sauce
Ingredients
Balls
1.5 lbs ground sirloin
2 eggs, beaten until subdued
1 pkg Onion Soup mix
1/4 c. ketchup
dash of Worchestire Sauce
3/4 c. seasoned bread crumbs
Sauce
1/4 c. margarine
1 onion, chopped
1 green pepper, chopped
1 c. water
1 can tomato soup
1 can chicken & rice soup
Preparation
Sauce
Melt margarine on medium-low heat. Sweat veg until tender. Add water and soups, bring to light boil. While coming to a boil, make the balls.
Balls
Mix all ingredients together and roll into 1.5" balls. Drop balls into sauce, keep space between them to they don't stick together. Cook on medium-high heat for 10-15 minutes, then reduce heat to medium-low and cook for 45-60 minutes, stirring occasionally.
Cajun Chicken Pasta
Ingredients
16 oz fettucine or your favorite pasta
3-4 chicken breasts, diced or chunked
2 tbsp cajun seasoning
4 tbsp butter
2 green bell peppers
1 red bell pepper
8 sliced mushrooms
2-3 green onions
1/2 tsp dried basil
1/2 tsp lemon pepper
1/2 tsp salt
1/4 tsp garlic powder
1/4 tsp ground black pepper
4 tbsp parmesan cheese
? cream
Preparation
Sliced up veggies and set aside. Combine spices (not herbs!) and set aside. Coat chicken in spice mixture, saute in butter for 6-7 minutes. Add veggies and continue saute for 2-3 minutes. Reduce heat, stir in cream. Season with herbs, heat through. Toss with pasta, top with cheese.
Tuesday, October 16, 2007
Thai One On Southern Gumbo
Ingredients
1 lb okra
1 can Rotel "Mexican Fiesta" - the blue label.
3/4 cup chick peas
4 ears of white corn
2 fillets of orange roughy - if you'd like to be environmentally conscious, use cod instead.
1 medium onion
5 cloves of garlic
1/2 can of coconut milk - use your judgment here (read on later)
Salt / Pepper to taste
1 tsp curry powder
1 tsp white pepper, ground
1/2 tsp coriander, ground
3 tbsp olive oil + dash of kosher salt
Preparation
Chop the onions into even pieces. Heat the olive oil and kosher salt in a large skillet or pan. Sweat the onions until they turn translucent - if they start to brown, turn the heat down. This should take about 3 minutes. Then, add the garlic and continue the sweat for another two minutes, stirring occasionally.
While that's going on, de-cap and de-tail the okra and slice them into even pieces. Set aside. De-ear the corn and set aside. For an added touch of flavor, roast the corn while still on the cob to toast it up. Add all these items as well as the chick peas into the pan, then kick the heat up to medium-high.
Poach the fish in a bit of olive oil and water. I wrap the fillet in parchment paper and pop it in the microwave for 4 minutes. After that's done, bust up the fillet and add into the pan. Add the coconut milk. Add the remainder of the spices and gently stir up, then just cook it all up until it's cooked to your satisfaction and the veg are tender.
Finally, drop the heat down to low (or off!) and let your gumbo simmer. After a few minutes, serve and enjoy!
Pot Pork Stickers Dim Sum
Monday, October 15, 2007
Tabbuleh, Tabouli, Tabooley
Ingredients
- Cracked Bulgur Wheat
- Parsley, chopped - remove stems as much as possible.
- Olive Oil - enough to coat the parsely. I usually eyeball this right from the bottle - no more than 2 tbsp.
- 1-2 Cucumbers, peeled & cubed. You can optionally seed the cukes, but I don't.
- 1 tomato, cubed. Roma tomatoes are good. For a Southern twist, try Green Fryer Tomatoes (not fried). They will add a nice crunch.
- Lemon Juice, to taste - adds a bit of acid bite.
- Salt & Pepper to taste optional.
Preparation
Cook the bulgar wheat per directions, and allow to cool off a bit, ideally to room temperature. While that's cooling, you can finish your mise en place on the vegetation. Note on quantities: I prefer more parsely such that the tabouli is more like a salad, however you may prefer a more wheatey dish, in which case, tailor the amount of parsely accordingly.
Take a large bowl, add the parsely and olive oil, toss to coat. Add tomatoes, cukes and lemon juice then toss to mix and coat. Finally, add the bulgar wheat and mix it all up.
Serve
You can use as a side salad (e.g. with kabobs), or top with peppery-crusted pork tenderloin and some tzatziki sauce - both of these will be forthcoming recipes once I get a moment to enter them in.
California Roll
Show: Good Eats
Episode: Wake Up Little Sushi
Difficulty: Medium
Prep Time: 45 minutes
Inactive Prep Time: 1 hour
Cook Time: 20 minutes
Yield: 8 appetizer servings
Juice of 1/2 lemon
1 medium avocado, peeled, pitted, and sliced into 1/4-inch thick pieces
4 sheets nori
1/2 batch sushi rice, recipe follows
1/3 cup sesame seeds, toasted
1 small cucumber, peeled, seeded, and cut into matchstick-size pieces
4 crabsticks, torn into pieces
Pickled ginger, for serving
Wasabi, for serving
Soy sauce, for serving
Squeeze the lemon juice over the avocado to prevent browning.
Cover a bamboo rolling mat with plastic wrap. Cut nori sheets in half crosswise. Lay 1 sheet of nori, shiny side down, on the plastic covered mat. Wet your fingers with water and spread about 1/2 cup of the rice evenly onto the nori. Sprinkle the rice with sesame seeds. Turn the sheet of nori over so that the rice side is down. Place 1/8 of the cucumber, avocado and crab sticks in the center of the sheet. Grab the edge of the mat closest to you, keeping the fillings in place with your fingers, and roll it into a tight cylinder, using the mat to shape the cylinder. Pull away the mat and set aside. Cover with a damp cloth. Repeat until all of the rice has been used. Cut each roll into 6 pieces. Serve with pickled ginger, wasabi and soy sauce.
Sushi Rice
Show: Good Eats
Episode: Wake Up Little Sushi
Difficulty: Easy
Prep Time: 5 minutes
Inactive Prep Time: 1 hour
Cook Time: 10 minutes
Yield: 4 cups
2 cups sushi or short grain rice
2 cups water, plus extra for rinsing rice
2 tablespoons rice vinegar
2 tablespoons sugar
1 tablespoon kosher salt
Place the rice into a mixing bowl and cover with cool water. Swirl the rice in the water, pour off and repeat 2 to 3 times or until the water is clear.
Place the rice and 2 cups of water into a medium saucepan and place over high heat. Bring to a boil, uncovered. Once it begins to boil, reduce the heat to the lowest setting and cover. Cook for 15 minutes. Remove from the heat and let stand, covered, for 10 minutes.
Combine the rice vinegar, sugar and salt in a small bowl and heat in the microwave on high for 30 to 45 seconds. Transfer the rice into a large wooden or glass mixing bowl and add the vinegar mixture. Fold thoroughly to combine and coat each grain of rice with the mixture. Allow to cool to room temperature before using to make sushi or sashimi.
Tomato Sauce
Show: Good Eats
Episode: Tomatoes
Difficulty: Easy
Prep Time: 25 minutes
Cook Time: 2 hours 30 minutes
Yield: 4 cups
20 Roma tomatoes, halved and seeded
1/4 cup olive oil
1/2 teaspoon kosher salt
1 teaspoon pepper
1 cup finely diced onion
2 teaspoons minced garlic
1 tablespoon finely chopped oregano leaves
1 tablespoon finely chopped thyme leaves
1 cup white wine
Preheat oven to 325 degrees F.
In 2 (13 by 9-inch) pans place tomato halves cut side up. Sprinkle with oil, salt and pepper, onion, garlic, and herbs. Bake tomatoes for 2 hours. Check the tomatoes after 1 hour and turn down the heat if they seem to be cooking too quickly. Then turn the oven to 400 degrees and bake another 30 minutes. Remove from the oven and process tomatoes through a food mill on medium dye setting over a small saucepan. Discard skins. Add white wine, bring to a boil, reduce heat to low and cook for 5 minutes.
Pantry Friendly Tomato Sauce
Show: Good Eats
Episode: Seeing Red
Prep Time: 10 minutes
Cook Time: 1 hour 15 minutes
Yield: 1.5 quarts
2 (28-ounce) cans whole, peeled tomatoes
1/4 cup sherry vinegar
1/4 cup sugar
1 teaspoon red pepper flakes
1 teaspoon dried oregano
1 teaspoon dried basil
1 onion
1 carrot
1 stalk celery
2 ounces olive oil
4 cloves garlic, minced
3 tablespoons capers, rinsed and drained
1/2 cup white wine
Kosher salt and black pepper, to tasteIn a sieve over a medium non-reactive saucepot, strain the tomatoes of their juice into the sauce pot. Add the sherry vinegar, sugar, red pepper flakes, oregano, and basil to the tomato juice. Stir and cook over high heat. Once bubbles begin to form on the surface, reduce to a simmer. Allow liquid to reduce by 1/2 or until liquid has thickened to a loose syrup consistency.
Squeeze each tomato thoroughly to ensure most seeds are removed. Set the tomatoes aside.
Cut carrot, onion, and celery into uniform sizes and combine with olive oil and garlic in a non-reactive roasting pan over low heat. Sweat the mirepoix until the carrots are tender and the onion becomes translucent, 15 to 20 minutes. Add the tomatoes and capers to the roasting pan.
Place roasting pan on the middle rack of the oven and broil for 15 to 20 minutes, stirring every 5 minutes. Tomatoes should start to brown slightly on edges with light caramelization. Remove the pan from the broiler. Place the pan over 2 burners on the stove. Add the white wine to the tomatoes and cook for 2 to 3 more minutes over medium heat.
Put the tomatoes into a deep pot or bowl and add the reduced tomato liquid to the tomatoes. Blend to desired consistency and adjust seasoning.
Sunday, October 14, 2007
Bitchin' Monk Witbier
Wort Ingredients
2 cans Witty Monk Malt Extract
2 packets of Brewer's Yeast
1/2 cup Honey
Brewing
Follow your typical brewing preparation instructions.
Fermentation
Ferment for 21 days at about 78-80°F. No secondary fermentation racking.
Bottling
Follow normal sanitation procedures for bottling. Add priming sugar to each bottle before filling, then fill 'er up.
Carbonation
At least one week in the bottle for proper carbonation.
Lagering
You can drink after the carbonation is completed, but if you let it lager (sit around in the refrigerator) for two weeks or more, you'll be pleasantly rewarded with a rounder flavor.
Enjoy!
RooBroo Honey Pale Ale
Wort Ingredients
1 can West Coast Pale Ale Hopped Malt Extract
1 can Pale Export Unhopped Malt Extract
2 packages of Brewer's Yeast
1 Package of "Booster" (basically corn syrup crystals)
1 cup of Honey
Brewing
Follow your typical brewing preparation instructions.
Fermentation
I fermented RooBroo for 21 days at about 78-80°F. No secondary fermentation racking.
Bottling
Follow normal sanitation procedures for bottling. Add two tablespoons of white sugar to each bottle before filling, then fill 'er up.
Carbonation
At least one week in the bottle for proper carbonation.
Lagering
You can drink after the carbonation is completed, but if you let it lager (sit around in the refrigerator) for two weeks or more, you'll be pleasantly rewarded with a rounder flavor.
Enjoy!
Make Your Own Hard Cider
5 gallons of preservative-free, sweet apple cider, preferably unpasteurized
Two packets of wine yeast (Lalvin 71B or Red Star Cote des Blancs are good choices)
Optional for higher alcohol content: 2 pounds of brown sugar or honey
Optional for creating a starter: one 16-ounce bottle of preservative-free, pasteurized apple juice
Optional for sparkling cider: 3⁄4 cup honey or brown sugar
Brew it up!
On brewing day, pour your cider into the brewpot and simmer it over medium heat for about 45 minutes. This will kill most of the wild yeasts and bacteria in the cider. Bolder cidermakers will forgo this step by pouring the sweet cider directly into a plastic bucket and then pitching in the yeast. If you follow this strategy, wild strains of yeast will still be in the sweet cider when it begins fermenting. This will alter the flavor of the cider. (It may or may not improve it.) If you do heat the cider, don’t let it boil! Boiling causes pectins to set, which creates a permanently hazy beverage. While simmering the cider, you can add the optional 2 pounds of brown sugar or honey. This will boost the fermentable sugar content in your cider and up the alcohol content.
Next, pour the cider into a sanitized fermentation bucket — an unsanitized bucket may spoil the cider.
To sanitize, pour a capful of bleach into your bucket, fill it with water, let it sit for a half an hour, then dump out and rinse with cold water. (You can also buy non-bleach, no-rinse sanitizers at homebrew stores.) Let the cider cool to nearly room temperature, then add your yeast — or starter, if you chose to make one. Stir the mixture for a minute or two with a clean stainless steel or plastic spoon to aerate, then seal the lid and affix the airlock. Place the bucket in a room or closet where the temperature is 60 to 75 degrees — the closer to 60 degrees, the better. Stay within this range if you can: At lower temperatures the cider won’t ferment, while higher temperatures will speed up fermentation, but may also change the flavor.
Let it Ferment
Within a day or two you should see the airlock start to bubble. The gas it’s releasing is carbon dioxide, a byproduct of the fermentation process. Congratulations, your soft cider is on its way to becoming a delicious, inebriating elixir of the gods! This bubbling should subside within two weeks, signifying an end to the primary fermentation. After that, let the cider sit another week to allow the yeast to settle out.
Options For Bottling
There are a couple of different ways you can go at this point:
- Option 1: Bottle the Cider Now. If you want to bottle the cider immediately, affix the rinsed food-grade tubing to the spigot on your fermentation bucket and pour the cider off into sanitized jugs or bottles. (Be gentle when moving the bucket full of cider. Sloshing can disturb the yeast sediment at the bottom of the bucket and cloud up your cider.) Seal the jugs or bottles. Let the bottled hard cider sit for another two weeks and then it will be ready to drink. Your cider will probably be “still” (i.e., not fizzy) unless you let it age for several months. Hard cider is more like wine than beer, and the flavor will improve as it ages.
- Option 2: Let it Clarify. If you only use one fermenter, your cider will taste fine, but may not be perfectly clear because it will probably still have some suspended yeast. To reduce cloudiness, siphon your cider into a secondary fermenter (another food-grade bucket). Sanitize this bucket before filling it with cider. Once you’ve siphoned your cider into the secondary fermenter, put a sanitized lid and airlock on it and place it back in a dark and, preferably, cool location. A month should be ample time for the cider to clarify. After it’s aged for as long as you can stand, bottle it as above. This cider will most definitely be “still,” with no bubbles.
- Option 3: Make Sparkling Cider. Regardless of whether you decide to bottle immediately or let it clarify in a secondary fermenter, if you want “sparkling” cider, you’ll have to add a couple steps at bottling time. First, boil 1 cup water with three-fourths cup honey or brown sugar. Pour this mixture into a sanitized bottling bucket (i.e., another fermentation bucket with a spigot at the bottom). Then, siphon your cider over from your fermentation bucket to the bottling bucket. The honey or brown sugar syrup and cider should mix together naturally, but stir slowly with a sanitized spoon if you feel it is necessary. Then, bottle as you would normally. You’ll have to let this sit a bit longer than the still cider, so the residual yeast will have time to ferment the sugar you added and carbonate the cider inside the bottle.
At this point, it’s time to start drinking your cider and thinking about brewing your next batch. With time and experience, your skills will grow and your recipes will become more complex. Soon, you’ll be making cider that delights your friends and terrifies your enemies.
Coconut Curried OkraMatoes & Scallops
Active time: 40 min Start to finish: 50 min
Servings: Makes 4 servings.
Ingredients
1/2 lb small fresh okra1 lb plum tomatoes
1 tablespoon plus 1/2 teaspoon salt
1 small onion, chopped
1 large garlic clove, chopped
1 (1-inch) piece peeled fresh ginger, chopped
2 to 3 teaspoons minced fresh jalapeño chile (including seeds)
1 cup low-sodium fat-free chicken broth
1 1/4 lb sea scallops, tough muscle removed from side of each if necessary
1/4 teaspoon black pepper
2 teaspoons vegetable oil
1 1/2 teaspoons curry powder (preferably Madras)
2/3 cup well-stirred canned reduced-fat coconut milk
1/4 cup loosely packed fresh cilantro leaves
Accompaniment: spiced basmati rice
Preparation
Trim tops of okra, being careful not to cut into pods.Cut an X in bottom of each tomato and immerse tomatoes in a 2-quart saucepan of boiling water for 10 seconds. Transfer tomatoes with a slotted spoon (save boiling water) to a bowl of ice and cold water to cool, then peel. Add 1 tablespoon salt to boiling water, then add okra and cook, uncovered, until just tender, about 5 minutes. Drain okra in a colander, then plunge into same ice water to stop cooking. Drain okra and pat dry with paper towels.
Quarter tomatoes lengthwise and seed, then cut each quarter lengthwise into 1/2-inch-wide strips.
Purée onion, garlic, ginger, jalapeño (to taste), and 1/4 cup chicken broth in a blender.
Pat scallops dry and sprinkle with pepper and remaining 1/2 teaspoon salt. Brush a 12-inch nonstick skillet with 1/2 teaspoon oil and heat over moderately high heat until just beginning to smoke. Brown scallops in 2 batches, turning once, about 4 minutes total. Transfer scallops as browned with tongs to a plate and keep warm, covered with foil. (Scallops will not be cooked through.)
Add remaining 1 1/2 teaspoons oil to skillet and reduce heat to moderate. Add purée carefully (it may splatter), then add curry powder. Boil, stirring constantly, 2 minutes. Add coconut milk and remaining 3/4 cup broth and bring to a simmer. Add tomato strips and simmer, stirring frequently, until tomatoes are softened, 3 to 4 minutes. Season sauce with salt and pepper.
Stir in scallops and okra and simmer until scallops are just cooked through, about 3 minutes. Divide scallops, vegetables, and sauce among 4 plates and sprinkle with cilantro.
Cooks' notes:
- Tomatoes can be peeled, seeded, and cut into strips 4 hours ahead, then kept, covered, at room temperature.
- Okra can be blanched and refreshed 4 hours ahead and chilled in a sealed plastic bag with a paper towel.
- Substitute your favorite fish for scallops.
- Substitute green beans for okra.
- Add more curry for some goo
Nutritional Information
Each serving contains about 239 calories and 8 grams fat.
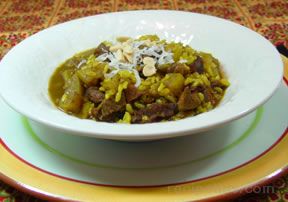
Easy One-pot Curry Recipe
| The delicious flavors of curry in a simple one-dish version make this ideal for leftover roast beef, lamb, pork or chicken. | |||||||||||||||||||||||||||||||||||||
| |||||||||||||||||||||||||||||||||||||
Easy to Make Miso Soup
Ingredients
4 oz container of thai style baked Tofu
5 medium raw button mushrooms
1/2 teaspoon sesame oil
3 cups water
2 tablespoons white miso paste
2 onions spring or scallions (includes tops and bulbs) raw, medium (4-1/8 long)
Instructions
Slice scallions (green onions) and mushrooms. Cut tofu into 1/2in cubes. This soup recipe can be made a little faster by boiling three (3) cups of water in your kettle while you do the first steps. Heat sesame oil in a saucepan and add scallions; stir for about one minute. Add 2 1/2 cups of boling water and bring to a boil. Dissolve the miso in 1/2 cup of boling water and add to the saucepan. Remove from heat; add mushrooms and tofu before serving.
Spice Rack: Vanilla
Vanilla beans are the offspring of fruit-bearing orchids, which were first cultivated (or perhaps "used" is a better term) by the ancient Totonaco people of Mexico. The Totonacos were conquered by the Aztecs, and when they folded to Cortez, well, Vanilla took root in several places - notably, Madagascar, Indonesia, Tahiti and it's home, Mexico. The process of cultivating vanilla beans can take as long as six years and includes hand-pollinating the orchid - so now you know why that bottle of 3 vanilla pods will set you back $7-10 in the store.
Here's some interesting information on the uses of vanilla:
- A few drops of vanilla in a can of paint will help eliminate unpleasant odors!
- A vanilla bean under your car seat gives a fresh aroma and helps eliminate musty odors.
- A teaspoon or so of vanilla in Italian tomato sauces or Mexican chili helps cut the acidity of the tomatoes!
- The United States consumption of vanilla beans is approximately 1,200 tons per year!
- In baking, cream the vanilla with the shortening or butter portion of the ingredients. The fat encapsulates the vanilla, preventing it from volatilizing in the baking process.
- Vanilla extract is used by veteran fishermen to mask the smell of their hands so the fish won't detect them!
Okra and Tomatoes
| |||||||
 | |||||||
| 1 pound okra, rinsed and trimmed 3 tablespoons olive oil 1 1/2 cups finely chopped red onion 1 1/2 teaspoons kosher salt 1 tablespoon minced garlic 2 cups peeled and chopped tomato 1 tablespoon minced fresh ginger 1 teaspoon freshly ground grains of paradise* or black pepper 1/2 teaspoon freshly ground cardamom Cut each okra pod in half lengthwise and set aside. If there are any pods longer than 4 inches, cut them in half crosswise and then lengthwise. Heat the olive oil in a 4-quart saucepan over medium heat until shimmering. Add the onions along with the salt and cook until they begin to turn golden, approximately 4 minutes. Add the garlic and cook for 1 minute longer. Add the tomatoes and bring the mixture to a boil. Decrease the heat to low and add the ginger, pepper, cardamom and okra. Stir to combine. Cook, uncovered for 20 minutes. Remove from the heat, taste and adjust the seasoning as desired. Serve immediately. *Cook's Note: Grains of Paradise are available online and in specialty spice markets. They have a zesty flavor reminiscent of pepper, coriander, and cardamom. | |||||||
Ratatouille Provencal
Ingredients
- 3.5 Pounds tomatoes
- 2 eggplants, cubed or cut into rondelles
- 2 zucchinis, cubed or sliced
- 1 green bell pepper, julienned
- 1 yellow or orange bell pepper, julienned
- 2 Pounds onions, chopped
- 10 cloves garlic, chopped
- 2 Tablespoons Herbes de Provence
- 1/2 cup olive oil, or enough for sauteeing
- Salt pepper to taste
Preparation Instructions
Sautee onions, garlic, and bell peppers in olive oil, stirring frequently, for 20 minutes. Add more olive oil as necessary to prevent burning.
Peel and core the tomatoes, and add to the pot. Simmer, covered, 15 minutes. Stir harshly enough to break cooked tomatoes into pieces.
Add eggplant and zucchini, Herbes de Provence, and salt and pepper. If your tomatoes are off-season or otherwise less than perfect, add up to 1/2 cup tomato paste to improve flavor. Recover and simmer 30 minutes.
Helpful Hints
This is an easy, one-pot version of a traditional French ratatouille. Serve hot or cold, as a soup or over rice or couscous.